How to Set Up a RHEL 9 Virtual Lab for RHCSA Practice
Published On: 11 April 2025
Objective
The objective of this guide is to provide you with a comprehensive, step-by-step approach to creating a fully functional RHCSA (Red Hat Certified System Administrator) practice lab using VirtualBox and RHEL 9 (Red Hat Enterprise Linux 9) on your local machine. This will enable you to simulate real-world scenarios, practice key Linux administration tasks, and prepare effectively for the RHCSA exam without the risk of affecting your main operating system.
Why a Virtual Lab Is Crucial
Creating a virtual lab environment offers several advantages, making it an essential tool for anyone pursuing the RHCSA certification:
-
Safe Practice: You can practice RHCSA objectives without the risk of damaging your real operating system.
-
Test and Experiment: Feel free to experiment with configurations, commands, and system settings. There's no fear of permanent damage to your environment.
-
Repetition: Repetition is key to mastery. You can repeat tasks as many times as needed to gain proficiency.
-
Simulate Real-World Setups: Virtual machines (VMs) allow you to replicate real-world enterprise setups, enabling you to simulate complex network configurations, multi-server environments, and more.
Requirements
|
Requirement |
Recommended |
|
RAM |
8 GB (16 GB for multi-VM setup) |
|
Disk Space |
40+ GB Free |
|
CPU |
At least Dual-Core |
|
OS |
Windows/Linux/macOS |
Step-by-Step Guide to Setting Up Your RHCSA Practice Lab
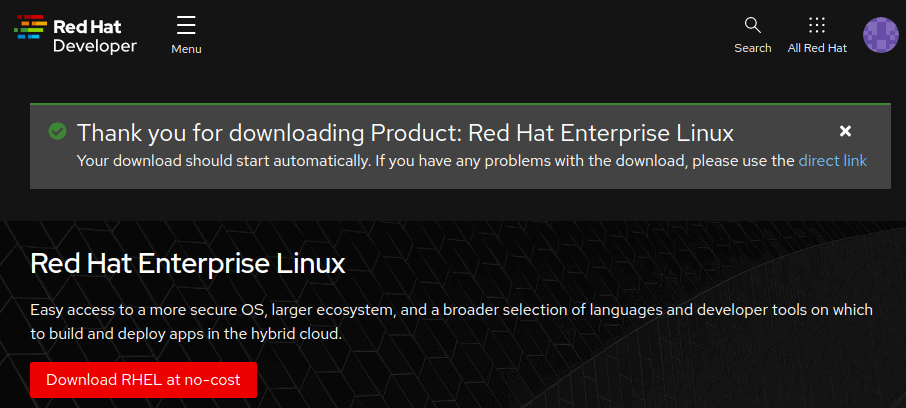
Step 1: Download RHEL 9 ISO (FREE LEGALLY)
To download RHEL 9 legally and free of charge:
-
Visit the Red Hat Developer Portal.
-
Create a free Red Hat Developer account and log in.
-
Navigate to the Download section and click on “Download RHEL 9 DVD ISO”.
-
Save the ISO file to a known location on your local machine.

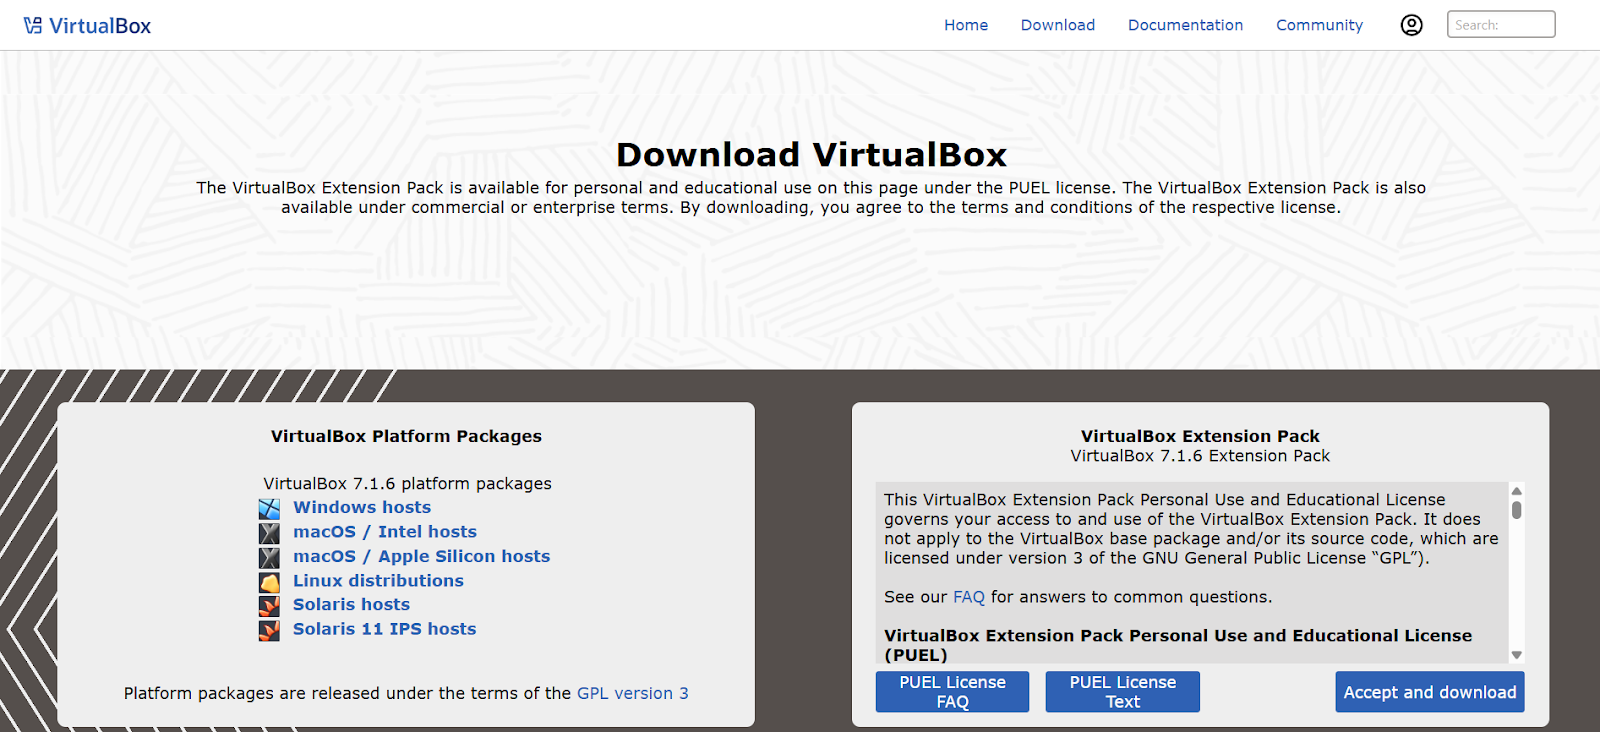
Step 2: Install VirtualBox
-
Go to the official VirtualBox download page.
-
Choose the appropriate version based on your operating system (Windows, macOS, or Linux).
-
Run the installer and follow the default installation settings.
-
Optional: Install the Extension Pack for enhanced functionality like USB support, network adapters, and more.
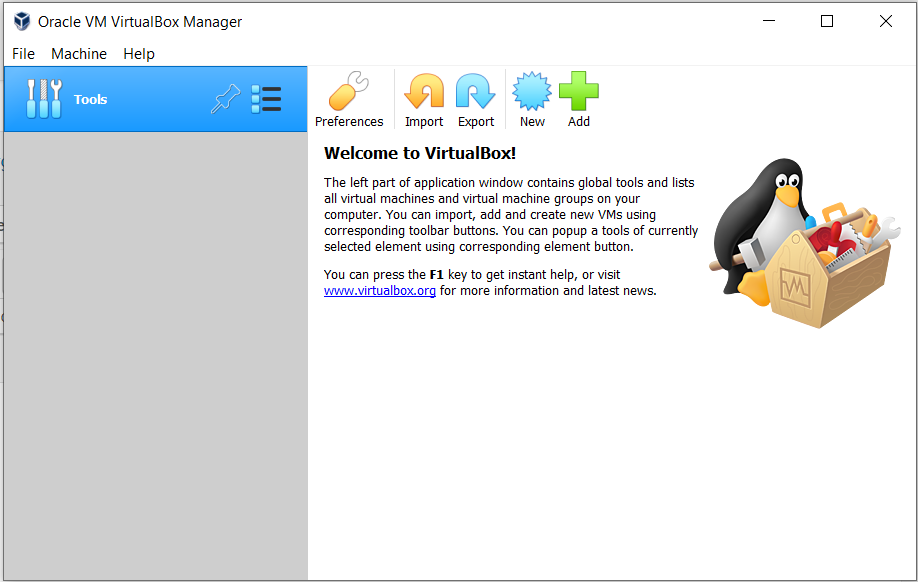
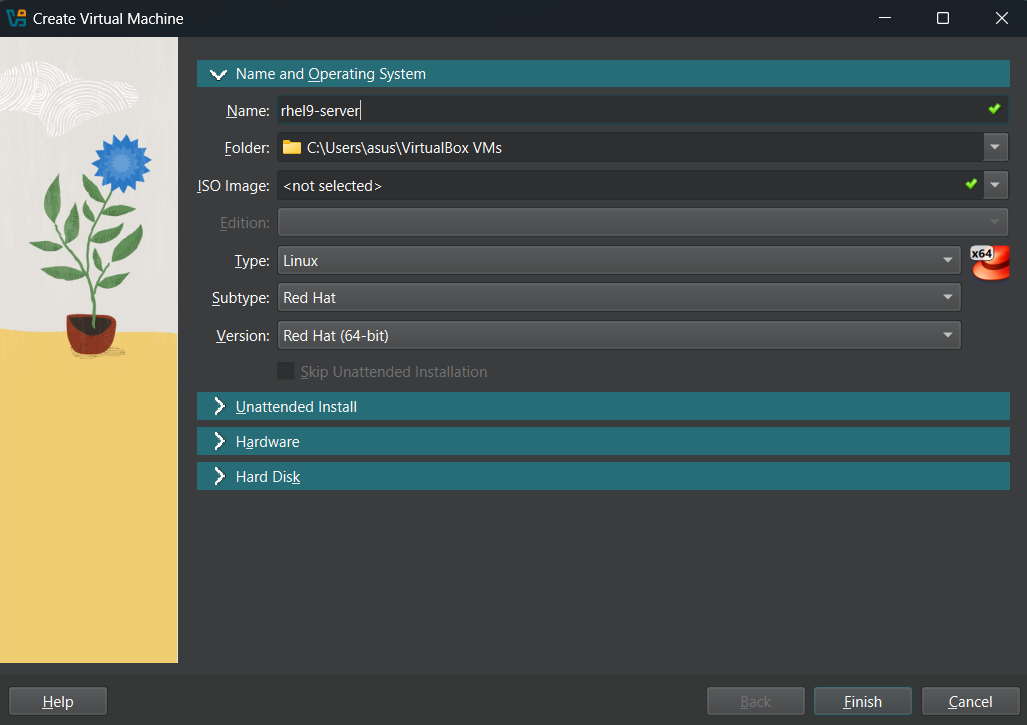
Step 3: Create a New Virtual Machine for RHEL 9
-
Launch VirtualBox and click on the New button.
-
Enter a name for the VM (e.g., "rhel9-server").
-
Select the type as “Linux” and version as “Red Hat (64-bit)”.
-
Click Next to continue.
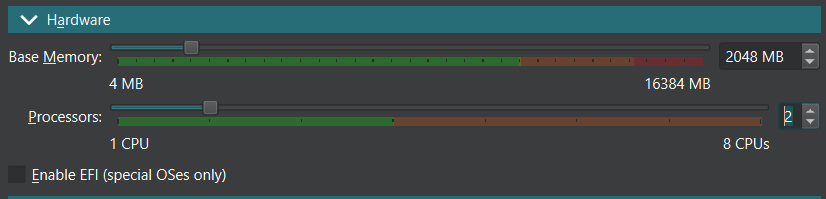
Step 4: Allocate Resources
-
RAM: 2048 MB (2 GB)
-
CPU: 1–2 cores
-
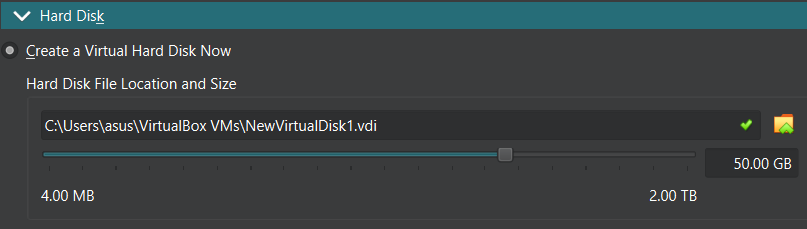
Disk Space: At least 20 GB (dynamically allocated).
-
Choose VDI (VirtualBox Disk Image) as the disk format.
-
Set disk size to 50 GB or more and choose Dynamically allocated to save space on your physical disk.
Step 5: Mount the RHEL 9 ISO to the VM
-
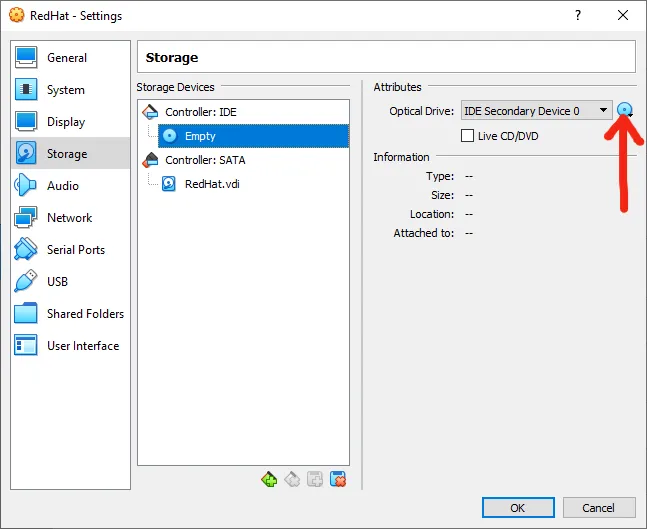
In VirtualBox, select your VM and click Settings.
-
Go to the Storage section.
-
Under Controller: IDE, click the Empty CD icon.
-
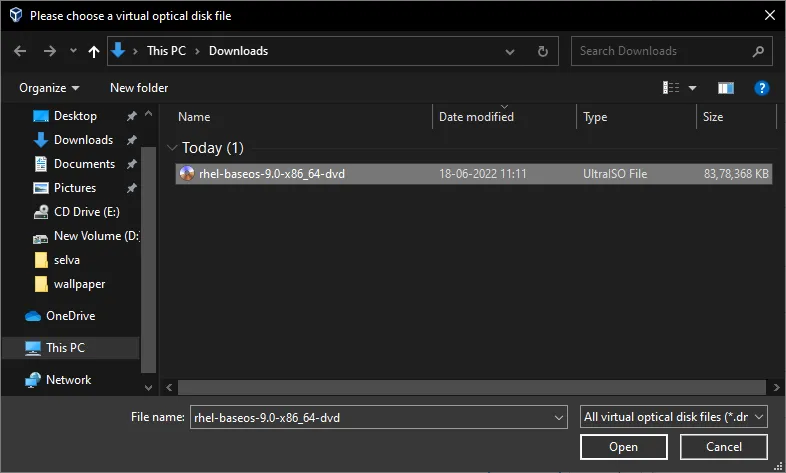
Select Choose a disk file, and browse to the location of the RHEL 9 ISO you downloaded.
-
Click OK to confirm the selection.
Step 6: Network Configuration
For now, use NAT (Network Address Translation) for internet access. If you plan to set up multiple VMs, you can later configure a Host-Only Adapter for internal networking between the VMs, or use Bridged Adapter for host-to-VM network connections.
Step 7: Install RHEL 9
-
Start the VM by clicking on the Start icon.
-
The RHEL 9 installation will boot. From the boot menu, choose Install Red Hat Enterprise Linux 9 and press Enter.
-
Follow the installation prompts:
-
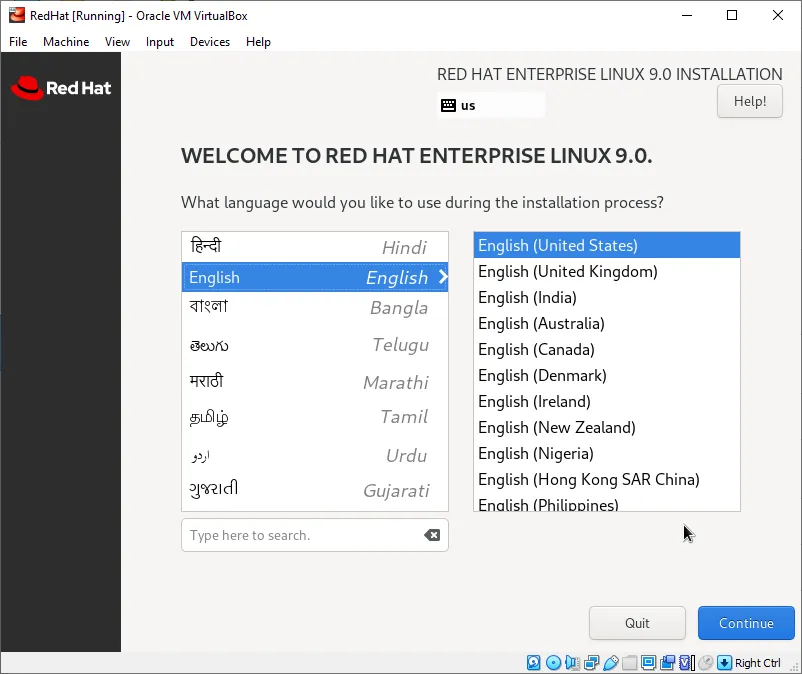
Language: Choose your preferred language (e.g., English).
-
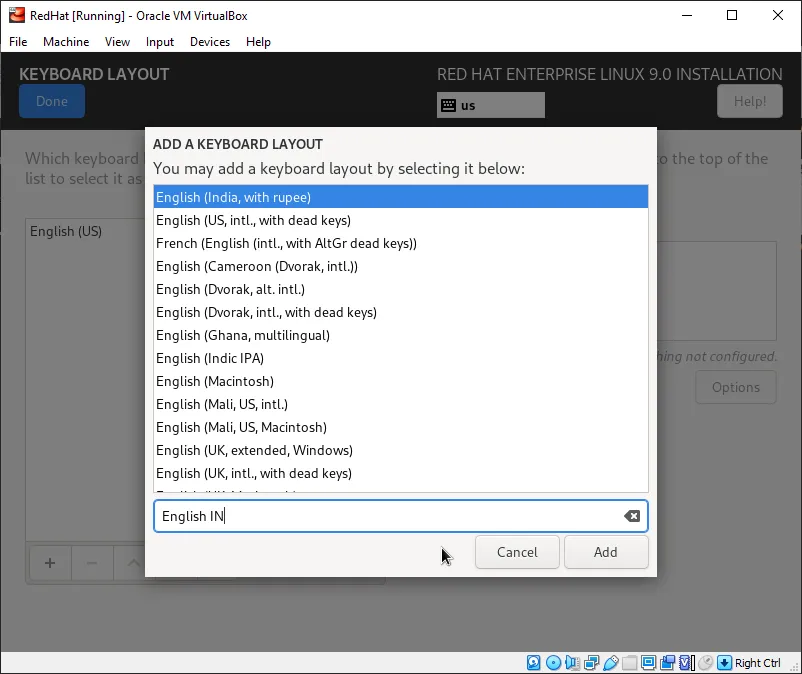
Keyboard: Select your desired keyboard layout.
-
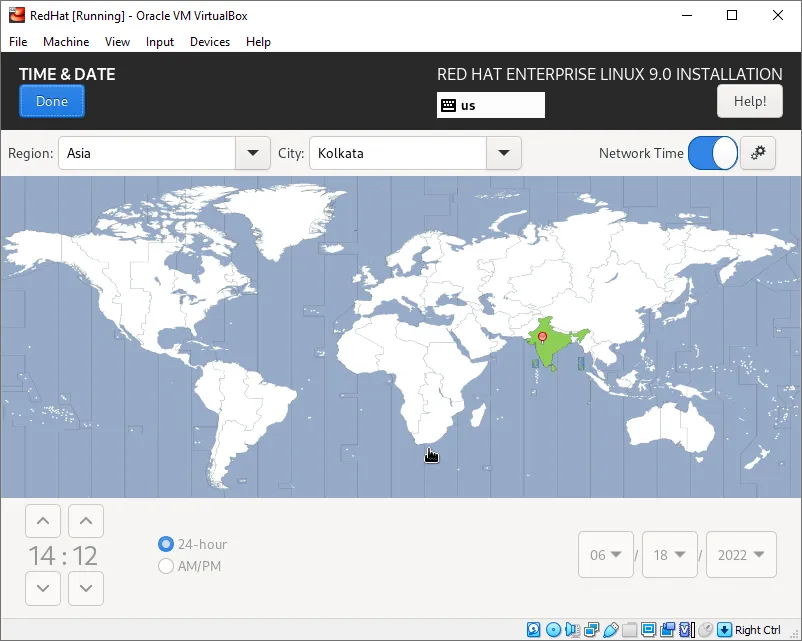
Time and Date: Choose your region and city.
-
Installation Source: Select the default Auto-detected installation source.
-
Software Selection: Choose Workstation (or Server with GUI, depending on your preference).


-
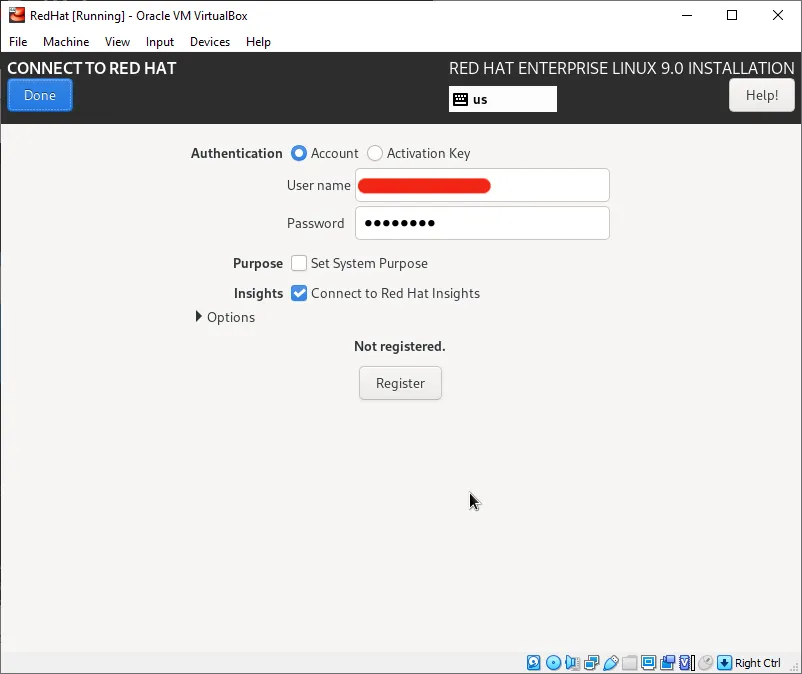
To Connect to Red Hat using authenticate with your Red Hat login credentials like Red Hat Username and Red Hat Password and Register it.Click Done.
-
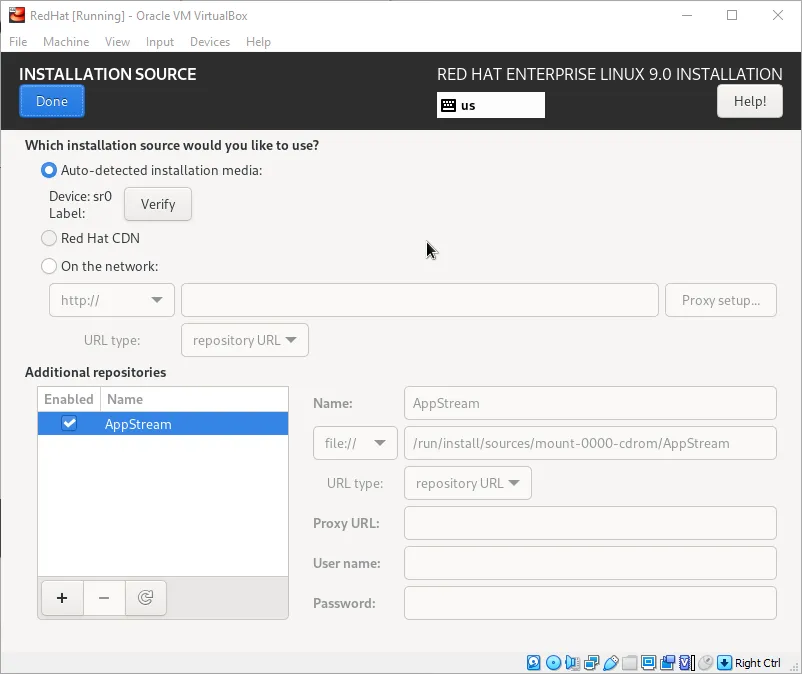
In the Installation Summary screen, select Installation Source, choose the default Auto-detected installation media option (e.g., DVD or ISO), and click Done.
-
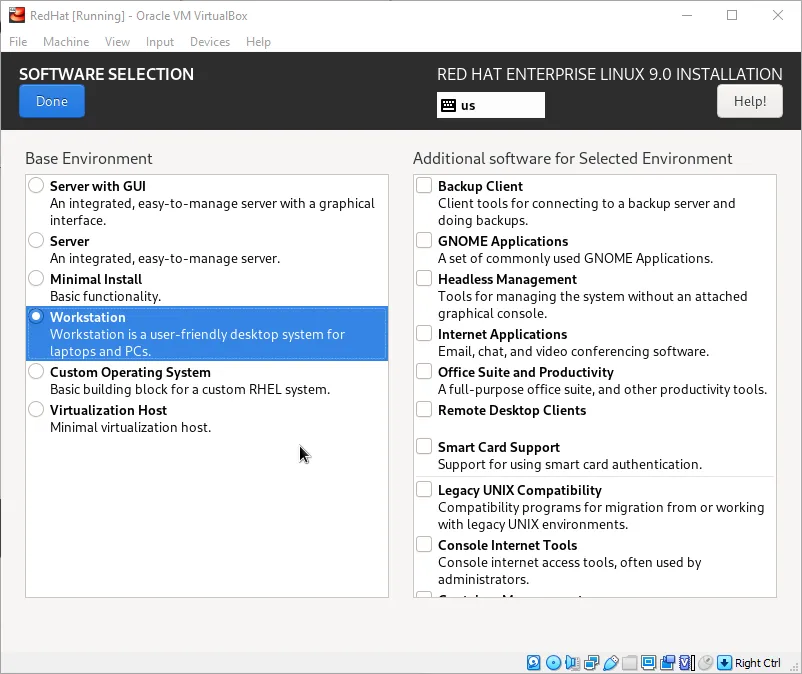
In the Software Selection screen, choose the desired installation type: Minimal Install (for advanced sysadmins), Workstation (for laptops/PCs), or Server with GUI (for a server with a graphical interface), then select any additional software for the environment, and click Done.
-
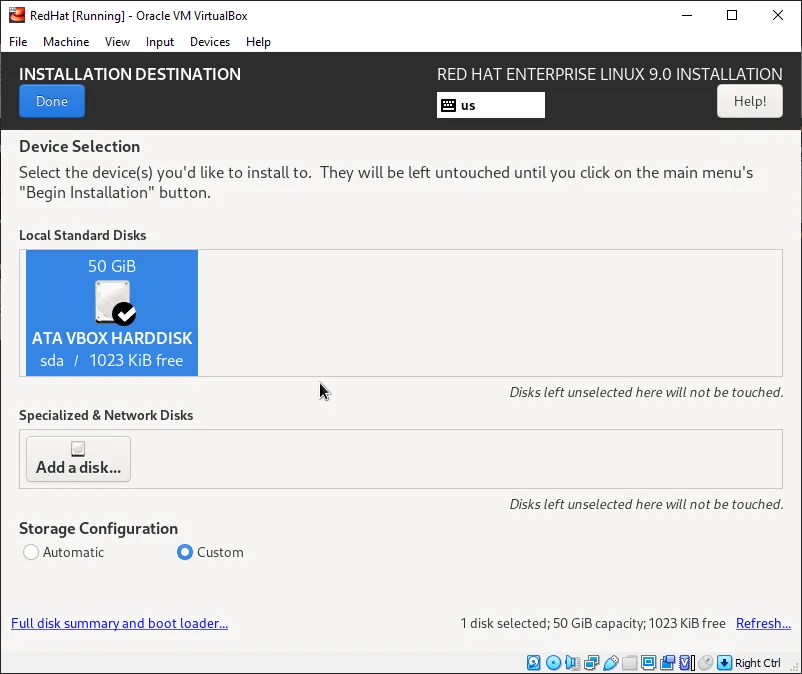
In the Installation Destination screen, choose the Automatic option to automatically partition the hard drive, or select Custom to manually create partitions, then ensure the correct disk is selected and click Done.
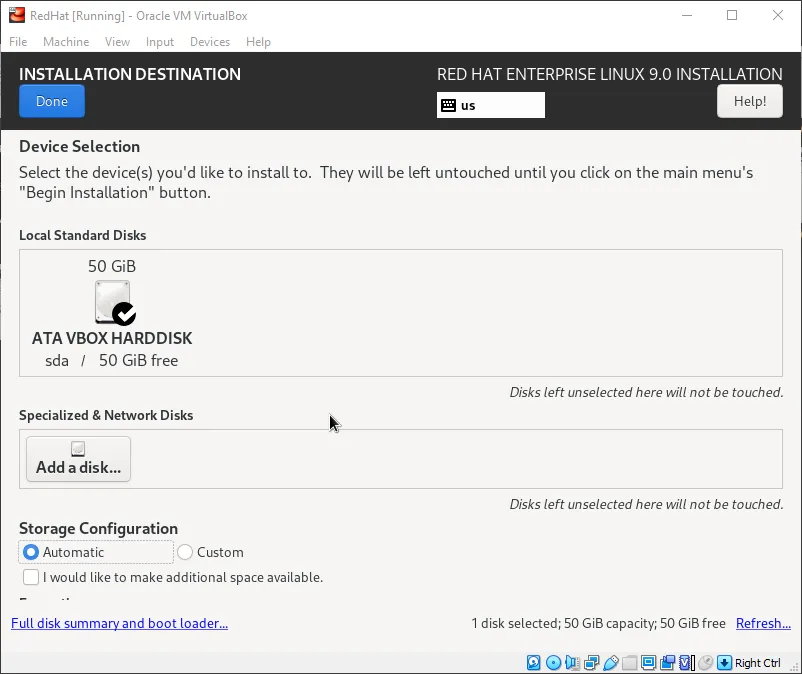
In my case, I selected the Custom option to manually create the partitions, then clicked Done.
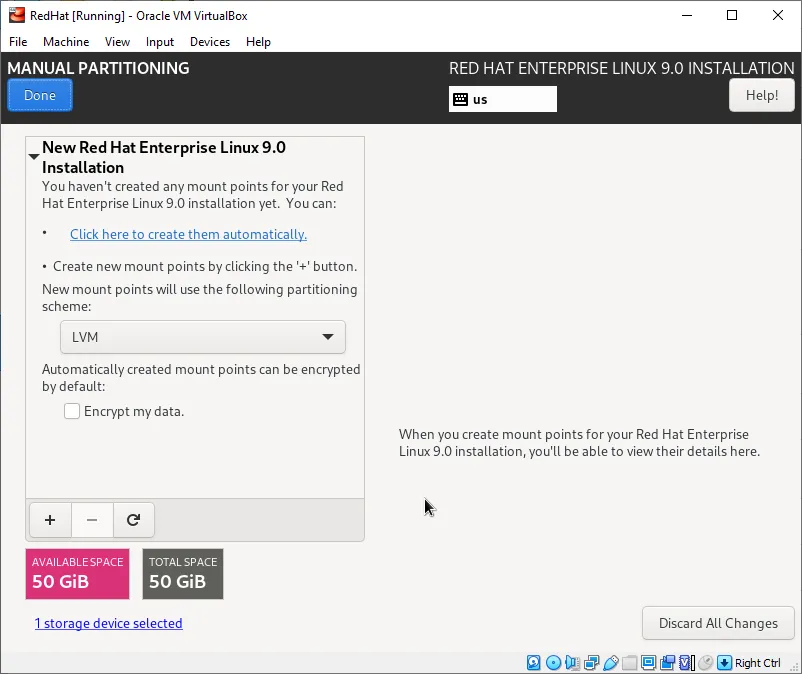
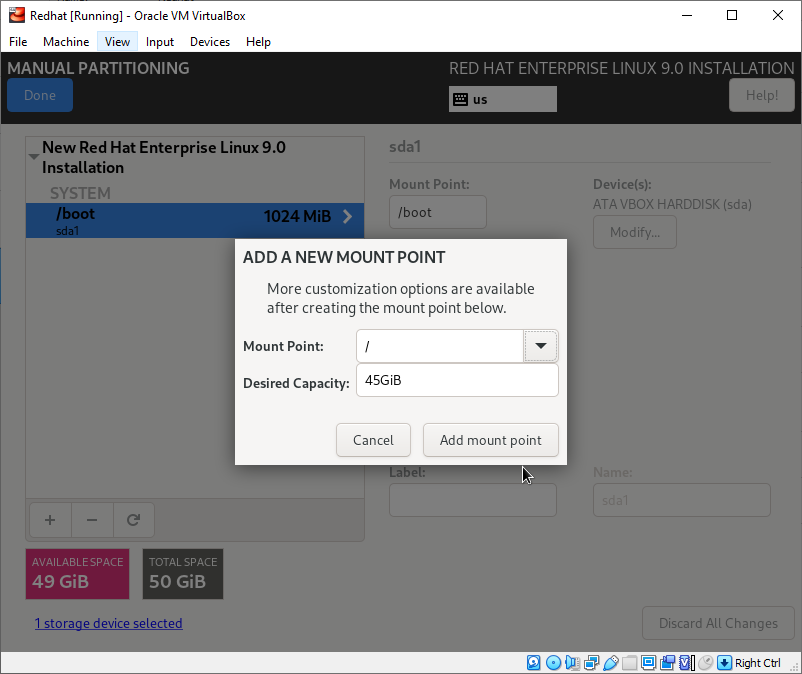
-
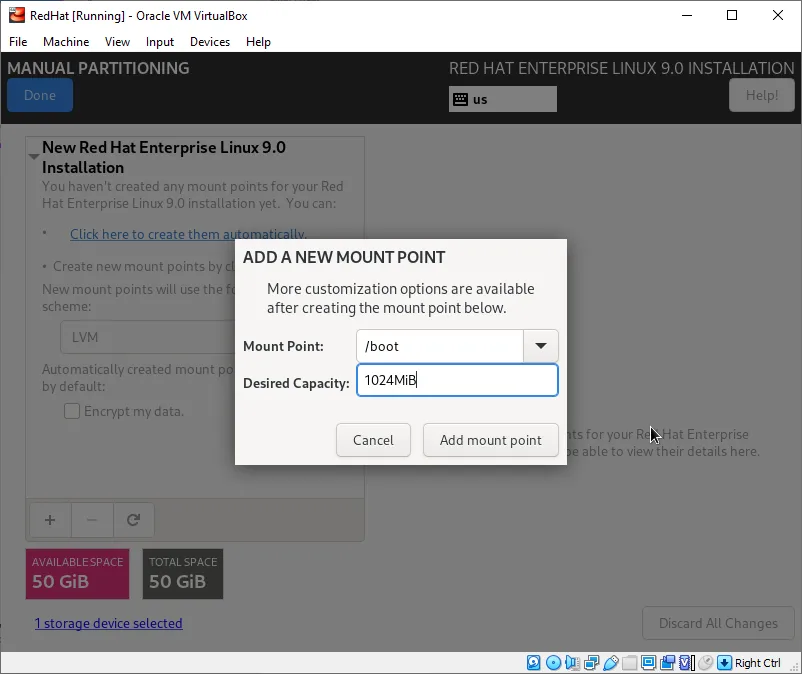
In the manual partitioning screen, the LVM partitioning scheme is selected by default. To create partitions, click the [+] symbol, and to delete a partition, click the [-] symbol. I will create the following partitions on a 50 GB disk:
-
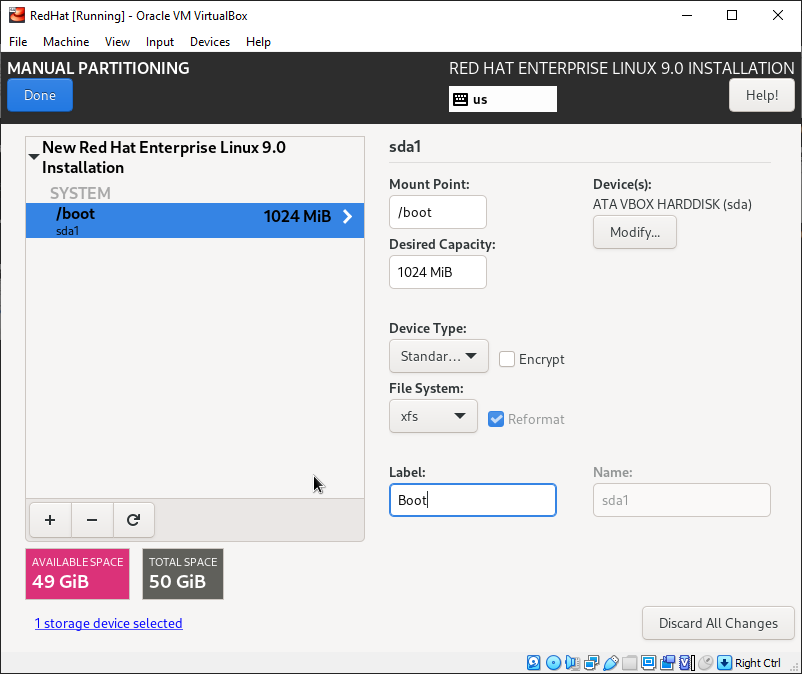
/boot: 1024 MB
-
/root: 45 GB
-
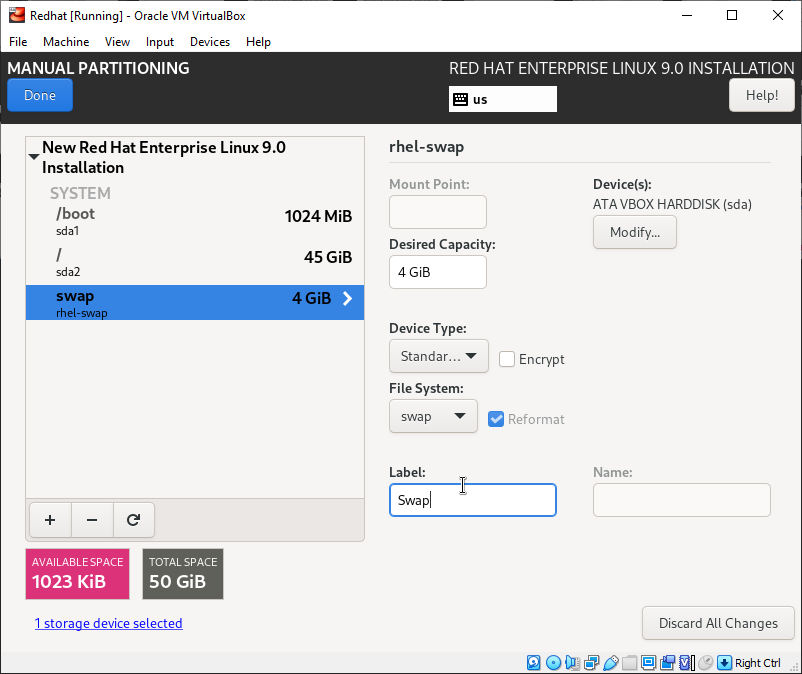
swap: 4 GB
-
You can adjust the partitions according to your needs and disk size.


-
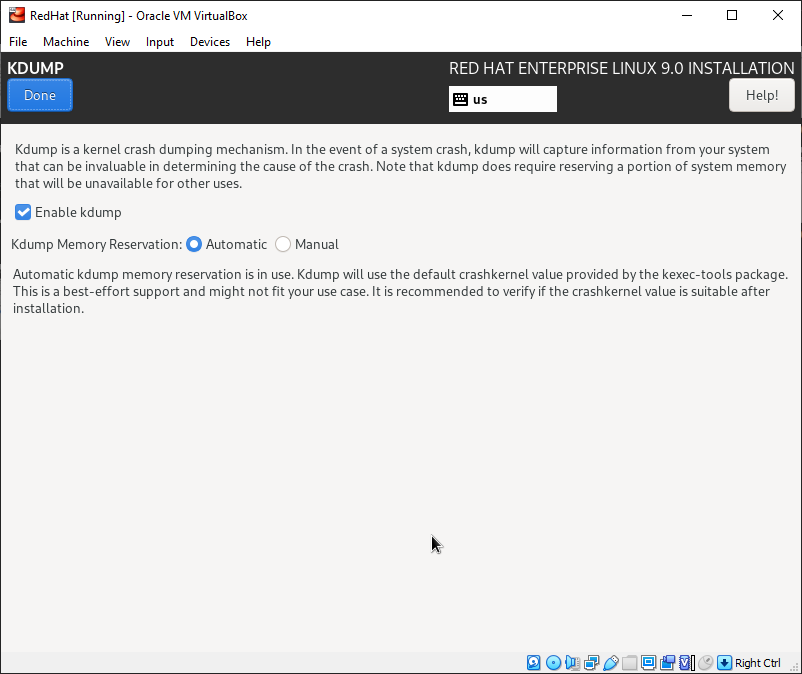
KDUMP is a feature of the Linux kernel that captures crash dumps when a kernel crash occurs. These dumps help in debugging and diagnosing the cause of the crash. If you uncheck Enable kdump, you can save memory. In my case, I chose to Enable kdump by default. Then, click Done.
-
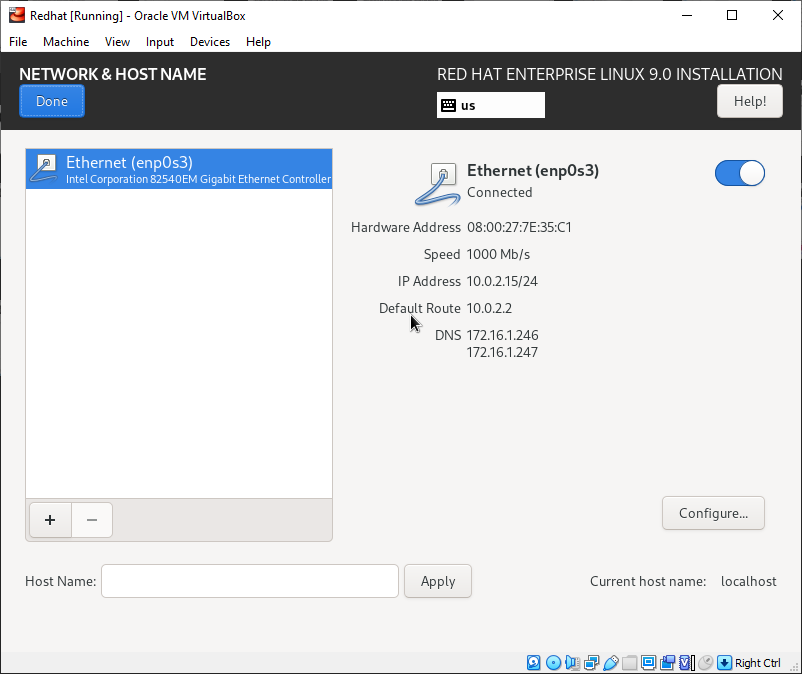
In the Network and Hostname section, turn on the toggle for the network interface. Setting a hostname is optional. In my case, I chose the default network. If needed, you can configure the network connection by adjusting settings. Once done, click Done.
-
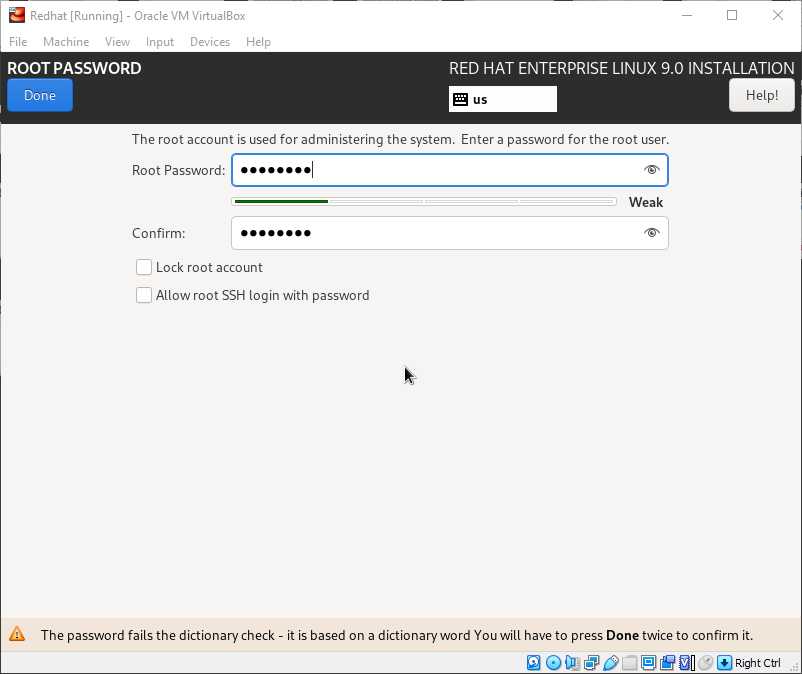
In the User Settings section, enter and confirm the Root Password for the root account. You can also choose to Lock the root account and configure whether to Allow root SSH login with a password. Once done, click Done twice to save your settings.
User Creation
-
In the User Creation section, enter your Full Name, Username, and set a Password (confirm it). You can also choose to Make this user an administrator and select whether to Require a password to use this account. Once done, click Done to save the user account settings.
-
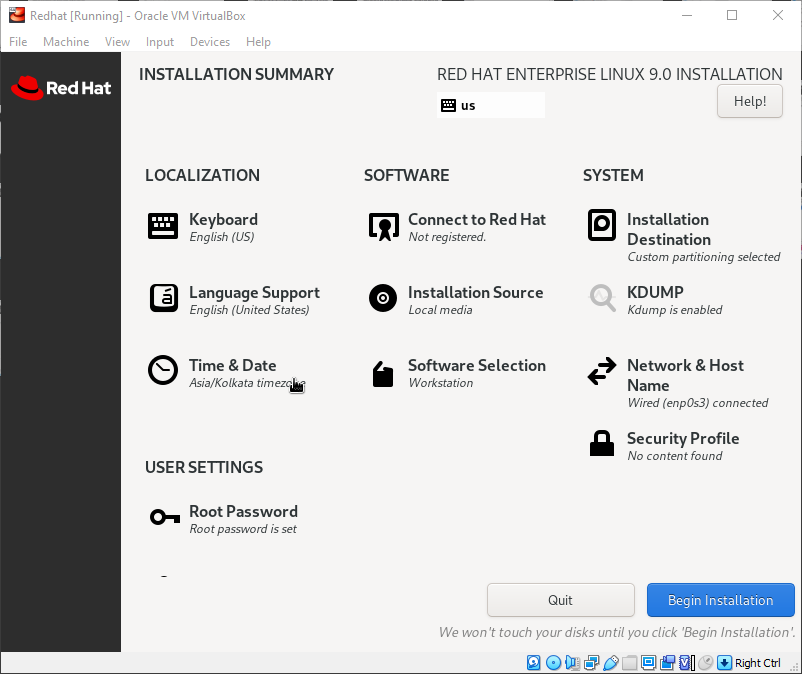
Now, review the Installation Summary to ensure all settings are correct. Once you’ve double-checked everything, click Begin Installation to start the installation process.
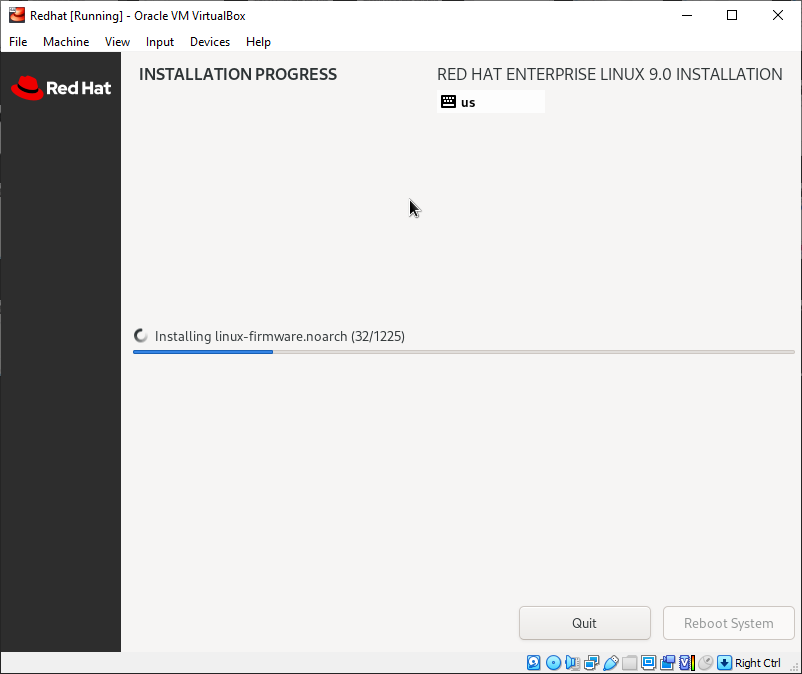
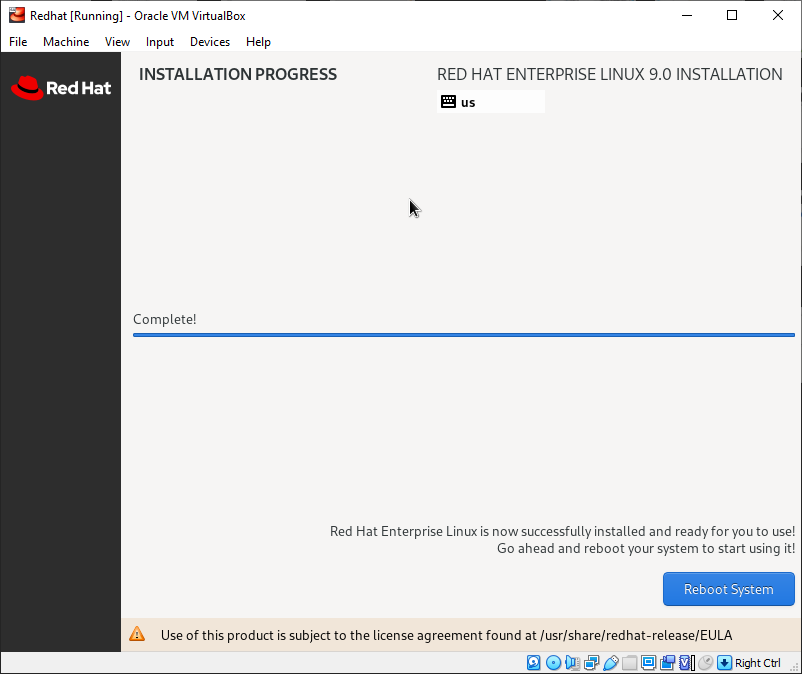
The Red Hat Enterprise Linux 9 Installation is now complete. At this point, it is safe to remove the installation media or unmount the ISO image file. During the reboot process, select the first entry in the boot menu and hit Enter. Finally, click Reboot System to complete the process.
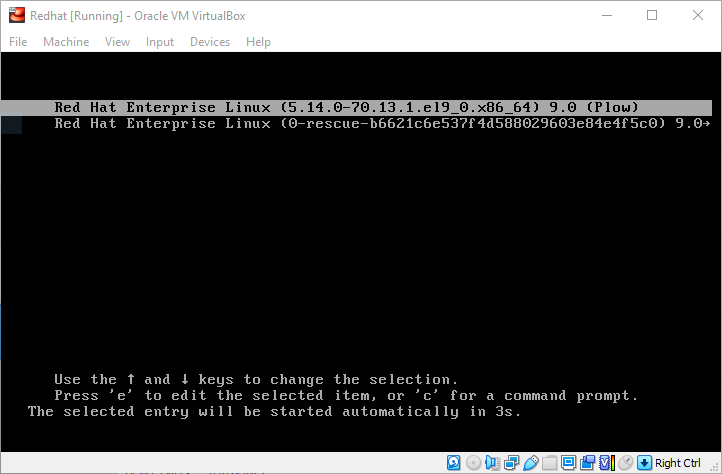
-
Once the installation is complete, the GRUB bootloader menu for Red Hat Enterprise Linux 9 will appear. Press Enter to boot into your newly installed system.
-
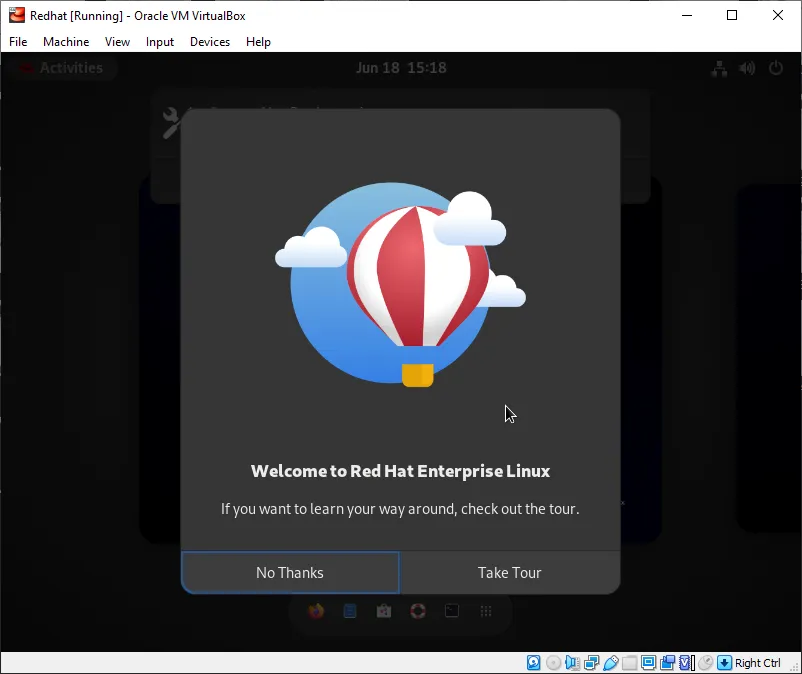
Once the Red Hat Enterprise Linux 9 login page appears, enter your login credentials and press Enter. After logging in successfully, you can start exploring RHEL 9 and begin practicing your RHCSA tasks.
Conclusion:
Congratulations! You now have a fully functional RHCSA practice lab running on VirtualBox using RHEL 9. This lab environment offers a risk-free, repeatable setup where you can practice key Linux administration skills and tackle real-world scenarios. By following this guide, you can master the RHCSA objectives at your own pace, test different configurations, and simulate enterprise setups with multiple virtual machines.
Having your own dedicated practice lab not only makes studying for the RHCSA more effective but also gives you hands-on experience in a controlled, isolated environment. Whether you are a beginner or an experienced Linux administrator, this virtual setup will provide all the tools and flexibility needed to successfully pass the RHCSA exam.
Good luck with your preparation, and feel free to experiment and explore as you progress on your journey to becoming a certified Red Hat system administrator!
Want all this in a ready-to-use format? Check out rhcsa.guru — hands-on labs, mock tests, and real-world scenarios for RHCSA & RHCE prep.